| In this section you will learn how to create a simple web page using the interface provided by the Macromedia Dreamweaver MX. |
|
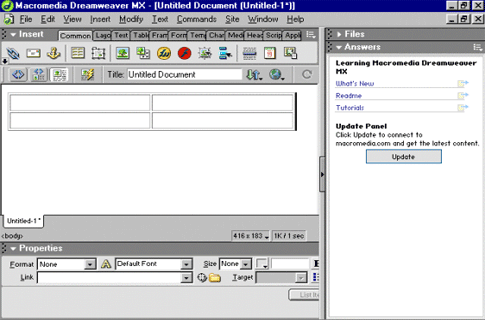
| Open a New Document |
| In the above sections you have learnt about the Dreamweaver and its purpose. You have also learnt the Interface of Dreamweaver. Now you will learn how to make a website by using the above discussed sections. |
| You will start with how to open a new page in Dreamweaver MX. |
To open a New Page perform the following steps:
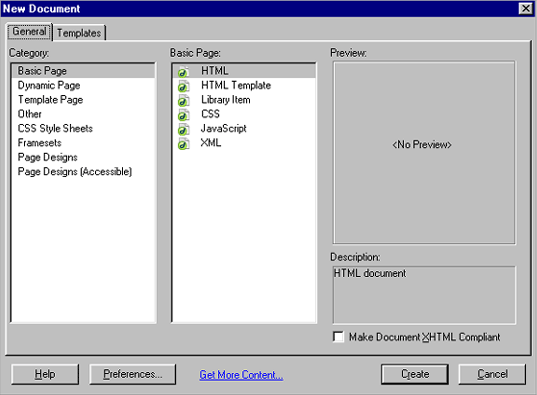
1. Click File menu on the menu bar, a sub menu drops down.
2. Choose New from the sub menu, a New Document window opens as shown in the figure below.
3. In the Category choose Basic Page and in the Basic Page choose HTML as shown in the figure below.
4. You can see the Preview and Description of the file in the New Document window.
5. Press Create Button to create a new document.
6. A New Document opens on the screen. |
|
TOP |
| Add Title to the Document |
| The Title is the text that appears in the title bar of the web brower. By default the title is Untitled Document. You can change the title that appears in the title bar of the web browser by giving a title to the page. The title can be changed using two methods: |
Method 1:
To give a title to a document perform the following steps:
1. Click View menu from the menu bar.
2. A sub menu drops down. Choose toolbar from the sub menu, further sub menu drops down.
3. Click Document from the sub menu. The Document bar opens as shown in the figure below.
4. In the Title field write the title of the page.
5. The title will appear in the title bar of the web browser. |

|
|
Method 2:
To give a title to a document perform the following steps:
1. Click Modify menu from the menu bar.
2. A sub menu drops down. Choose page properties from the sub menu.
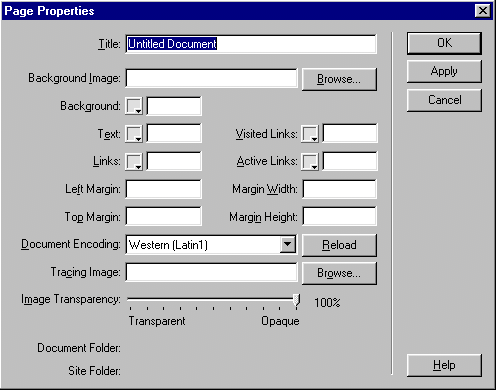
3. The Page Properties window opens as shown in the figure below.
4. By default the Title field shows Untitled Document. Write the title of the page in the title field.
5. The title will appear in the title bar of the web browser. |
|
|
Note
The shortcut to open Page Properties window is Ctrl + J. |
TOP |
| Set page properties |
| Using the Page Properties option, you can change the Title, Background Image, Background color, Text color, Links color, Set Margins, Margin Width and Height, Document Encoding, Tracing Image and Image Transparency. The above figure shows the Page Properties Window. |
|
| Table lists the function and uses of the Properties Inspector. |
| |
Menus |
|
Functions |
1. |
Title |
|
The Title is used to add the text that appears in the title bar of the web brower. |
2. |
Background Image |
|
You can add an image in the background of your document by using the Background Image option. Click on the browse button as show in the above figure. Navigate the image that you want to set as background of your document and press OK. The image will be set as background of the document. |
3. |
Background Color |
|
You can add any color to the background of a document by using the Background Color option in the Properties Inspector. Clicking on the box that opens the color swatches panel as shown in the above figure. Choose the desired color. The background color will be changed. |
4. |
Text Color |
|
By default the text color is black. You can choose any color of the text by clicking the box that opens the color swatches panel. Choose the desired color. The text color will be changed. |
5. |
Links Color |
|
You can change the Hyperlinks color by selecting the color from the Links Color option. You can also change the color of Visited Links and Active Link. |
6. |
Set Margin |
|
You can specify the page properties by setting the Set Margin option. Internet Explorer shows the changes done using the Set Margin option where as Netscape ignores it. When you do not want to set any margins in the browser set the values as 0. |
7. |
Margin Width and Height |
|
To set the page marigins for Netscape the Margin Width and Height option is used. Internet Explorer ignores it. |
8. |
Document Encoding |
|
The Document Encoding is used to specify encoding used by the characters in the document. By default it is Western (Latin1). You can change it with Central European, Cyrillic, Greek, Icelandic, Japanese, Traditional Chinese, Simplified Chinese, Korean and more. |
9. |
Tracing Image |
|
Tracing image can be used to re-create a page that was mocked up in a graphics application. The image that can be placed in the background of the Document window is a tracing image, for example JPEG, GIF or PNG image. You can set the opacity, change its position and hide the image. |
10. |
Image Transparency |
|
|
|
TOP |
| Type Text and Set Font Properties |
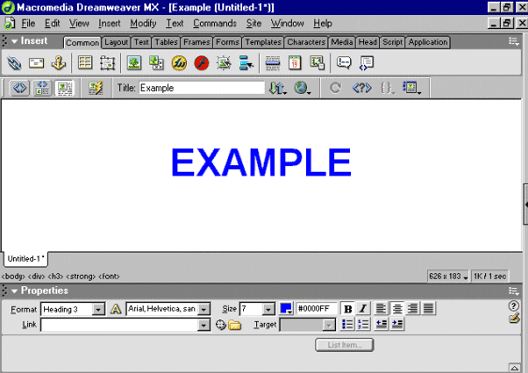
You can set the Font and Text Type in your document by using the properties inspector. To set the text type and font perform the following steps:
1. If the Properties Inspector is not open, click the Window menu from the menu bar a sub menu drops down.
2. Choose the Properties option from the drop down. The properties inspector opens at the bottom of the document as shown in the figure below.
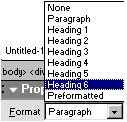
3. Type EXAMPLE on the Stage. If you want to set the Text Format as a Heading or a paragraph, click on the Format option a drop down opens. Choose the Type of format as shown in the figure below. The text will be formatted.
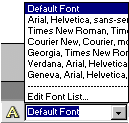
4. When you want to set the font type, click on the drop down option in the Toggle CSS/HTML Mode and choose the desired font from the list as shown in the figure below.
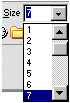
5. To increase or decrease the size of the font click on the drop down of font size option. Choose the desired size as shown in the figure below.
6. By default the text color is black you can change the text color by using the Text Color option. When you click on the Text Color a color swatch opens as shown in the figure below. Choose the desired color of the text.
7. You can format the text as Bold or Italics by clicking on the desired options as shown in the figure below.

8 You can align the text as left, right, centre or justify by using the desired option as shown in the figure below.

9. The figure below shows the complete formatting of text and font. |
|
Note
The shortcut to open Properties Inspector is Ctrl + F3 |
TOP |
| Insert a New Table |
| There are two methods by which you can insert a new table. |
| Method 1 |
1. Open the Insert menu as discussed above.
2. Click on the Insert table button as shown in the figure below: |
 |
3. The Insert Table window opens as shown in the figure below:
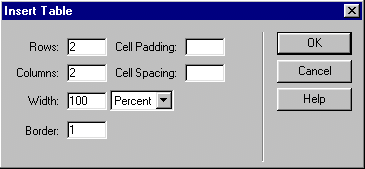
4. Enter the desired rows, columns, width, border, cellpadding and cellspacing. Press OK to proceed.
5. The desired table opens on the screen. |
| Method 2: |
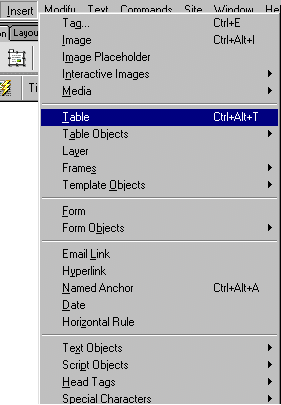
1. Click the Insert menu from the menu bar a sub menu drops down.
2. Select the Table option as shown in the figure below.
3. Create New Table Window opens.
4. Enter the desired rows, columns, width, border, cellpadding and cellspacing. Press OK to proceed.
5. The desired table opens on the screen as shown below:
|
Note
The shortcut to Insert a Table is Ctrl + Alt + T |
TOP |
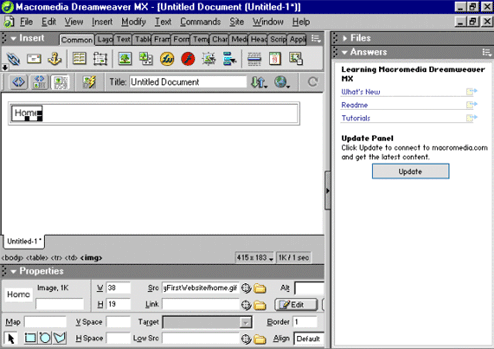
| Insert Images |
| There are two methods by which you can insert an image in the document. |
| Method 1 |
1. Open the Insert Menu as discussed above. A drop down opens.
2. Click on the Image option. An Image Source window opens as shown in the figure below:

3. Browse the desired image and press OK button.
4. The image is inserted in the document. |
| Method 2: |
| 1. Open the Insert Bar as discussed above. The Insert Bar is shown in the figure below:

2. Click on the Image option. An Image Source window opens as shown in the above figure.
3. Browse the desired image and press OK button.
4. The image is inserted in the document as shown in the figure below:
|
TOP |
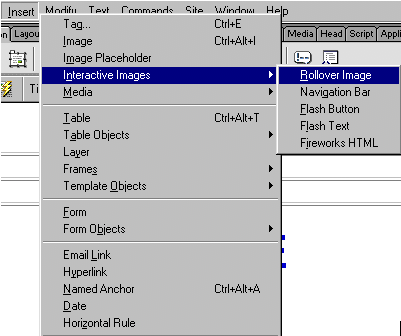
| Insert Rollover Images |
A rollover image is that in which when you open your browser and you place a mouse on the current image changes with the other image. For image rollover you need two images of the same size. One is the Original image which will be visible when you see it in the browser the other is the Rollover image which will be visible when you place your curser over the original image.
There are two methods by which you can use rollover image. |
| Method 1: |
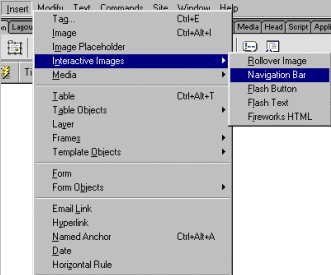
1. Click on Insert menu from the menu bar a sub menu drops down.
2. Click on the Interactive Images from the drop down a further sub menu drops down.
3. Choose Rollover image from the sub menu as shown in the figure below:
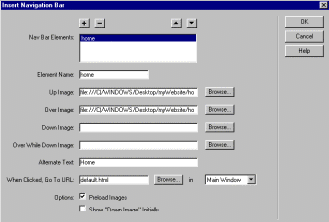
4. The Insert Rollover Image window opens as shown in the figure below:
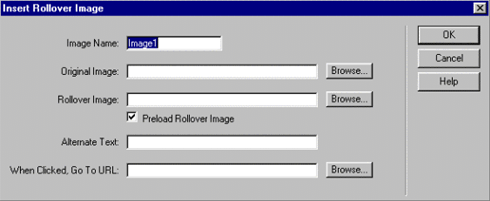
5. Give a name to the image by default it is Image1.
6. Browse the Original Image that will be open when you see in the browser.
7. Now browse the Rollover Image that will be visible when you rollover your mouse on the original image.
8. By default the Preload Rollover Image is selected. This is used when you remove your mouse from the rollover image the original image is visible again. If you do not select this option the rollover image will be visible even if you remove your mouse from the rollover image.
9. When you place your mouse on the image there is a text below the cursor that is the Alternate Text. Type the text in the Alternate Text field.
10. You can give Hyperlink to an image using the When Clicked, Go To URL option. Browse the URL and press OK button. The URL is given to the rollover image. |
TOP |
| Method 2: |
1. Open the Insert Bar as discussed above. The Insert Bar is shown in the figure below:

2. Click on the Rollover image button.
3. The Insert Rollover Image window opens as shown in the above figure.
4. Perform steps 5 to 10 as discussed in method 1. |
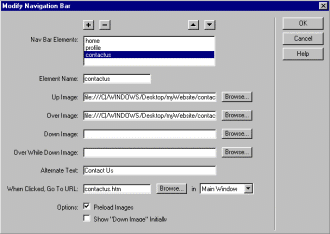
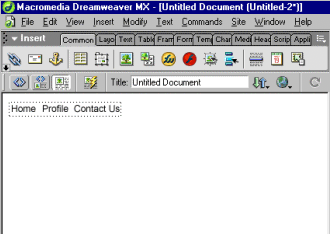
| Create Navigation bar with images |
| The Dreamweaver MX provides you easy facility to create navigation bars. Navigation bar consists of image or sets of images. The action occurs when you place the mouse or clicks on it. Navigation bars provide allows you to move between pages and the files on a site. |
| Task A-2: Creation of Navigation Bars |
| In this exercise, you will learn how to create Navigation Bars. |
|
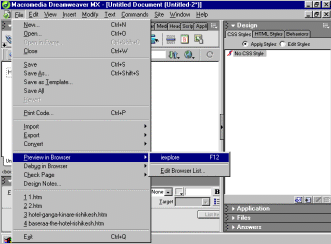
Note
The shortcut to Preview a page in the Browser is F12 |
TOP |
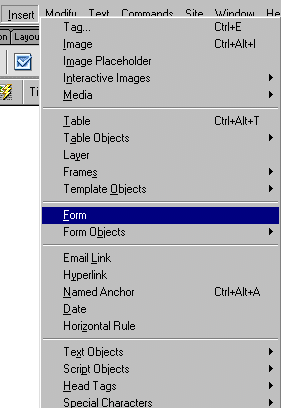
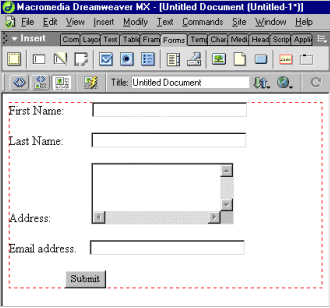
| Create a Form |
When you create text files and insert images in the document, there might be some information that you want user to submit it in your database or you want the information to display on the Internet for that forms need to be created.
Using a form you can create text fields, buttons, image, checkboxes and more can be created in a form by using the Insert Bar in Dreamweaver MX. The figure below shows the forms Insert menu.

|
| Task A-3: Create a Form |
| In this exercise, you will learn how to create a form. |
|
|